To connect scanned documents the you can navigate to Accounting > Registration > Connect documents.
The interface is as below: a picture of a document is on the left side and a list of entries is on the right side.
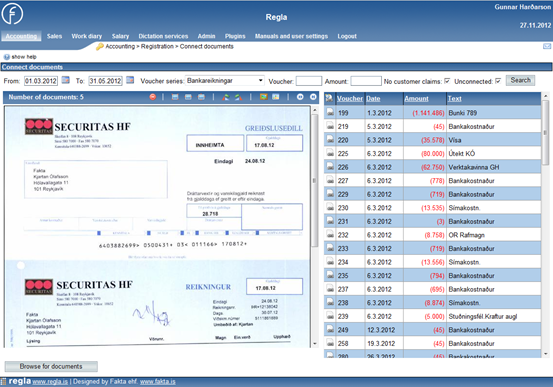
To browse document page by page you can click the ![]()
![]() or
or ![]()
![]() buttons above the document. The order of the documents can be set in the User settings menu. You can also choose where the application should scan documents from computer.
buttons above the document. The order of the documents can be set in the User settings menu. You can also choose where the application should scan documents from computer.
Documents are connected to an entry by selecting the appropriate document and clicking the ![]() button in front of the appropriate entry. The document will then disappear from the display area and a number will display near the entry, indicating how many documents have been connected to it (up to 4). To view the documents connected to a specific entry, you can click the number icon and then in a new window documents will display. You can also disconnect documents in the same window.
button in front of the appropriate entry. The document will then disappear from the display area and a number will display near the entry, indicating how many documents have been connected to it (up to 4). To view the documents connected to a specific entry, you can click the number icon and then in a new window documents will display. You can also disconnect documents in the same window.
Some documents are not connected with any specific entry. Instead, they are connected with a specific period. This can be realized by clicking the ![]() button at the top of the list and therefore the document can be connected with either a specific year or a month. To disconnect documents with a period, you can click the
button at the top of the list and therefore the document can be connected with either a specific year or a month. To disconnect documents with a period, you can click the ![]() button. To view documents that are connected with a period, you can navigate to Queries>Connected documents on period. After click Browse for documents, you can browsed them.
button. To view documents that are connected with a period, you can navigate to Queries>Connected documents on period. After click Browse for documents, you can browsed them.